Unpacking and Installing API Nexx Base Canister Aquarium Filter

The API Nexx canister filtration system has arrived! All of the pieces and steps to start setting up my new 30 gallon saltwater aquarium at Aquarium Tip Tank are coming together! You can hear all about my filtration selection process in Aquarium Tip Tank Podcast 008. Included here are some pictures of unpacking the API Nexx canister filtration system, and some videos about setting up the filtration system an putting some filter media into it!

Update: We do not currently recommend the API Nexx Canister Aquarium Filter. It leaked when I first set it up for my aquarium system check. Somehow, I got it to work for 4 days without any leaks during the system check. Then, I drained the aquarium, put live sand into the tank, put live rock into the tank, filled the tank up with saltwater and re-started the API Nexx Canister Filter. A few hours later I went to check on the tank only to find a puddle under the tank stand. The API Nexx Canister Filter was leaking from the base. I have removed the filtration system from the tank while it is cycling. I am in contact with representatives from RENA and will post updates with the outcome.

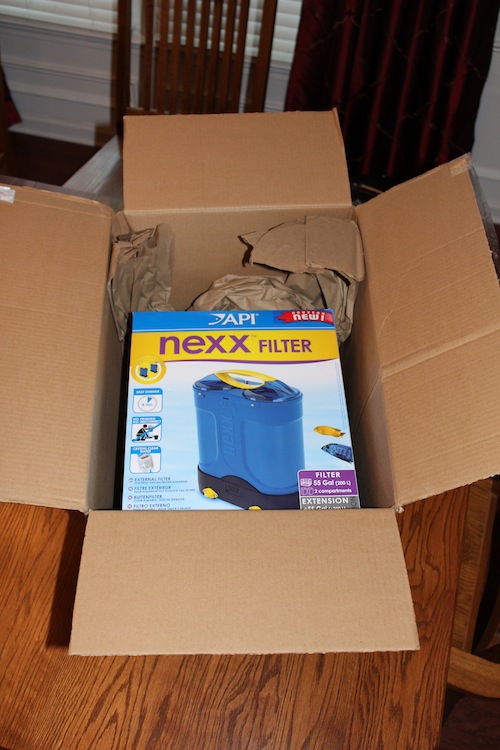
API Nexx Canister Filter in opened shipping box

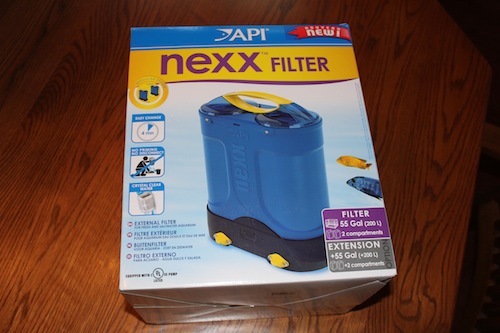
Front Cover of API Nexx Canister Filter box

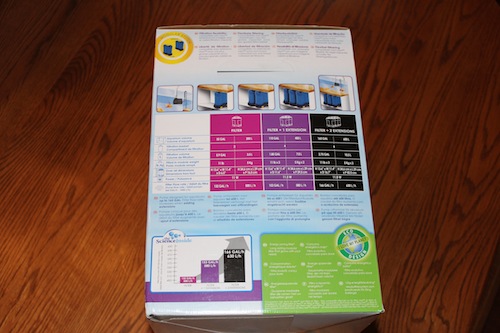
Side of API Nexx Canister Filter box

The side of the box that the API Nexx Canister Aquarium Filter comes in shows that it has a modular design and 2 extensions are able to be added to the base filter in order to accommodate aquariums that are larger than 55 gallons. Each extension is rated for another 55 gallons of aquarium filtration. Therefore, with just the base unit you get 55 gallons of filtration. With the base unit and 1 extension the canister filtration system is rated for 110 gallons. With the base unit and the maximum of 2 extensions, the API Nexx Canister filtration system is rated for 165 gallons.

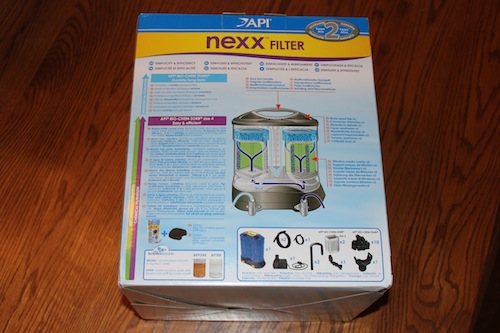
Back of API Nexx Canister Filter box

The back of the box that the API Nexx Canister Filter comes in shows a diagram of how the water flows through the system with a by-pass free circulation for complete water flow through the filter media.

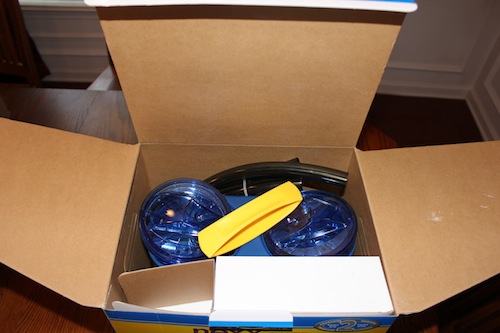
API Nexx filter box opened!

The API Nexx Canister Aquarium Filtration system was packaged well with all of its components well padded from shipping mishaps.

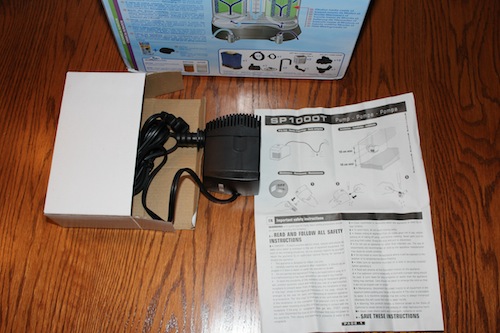
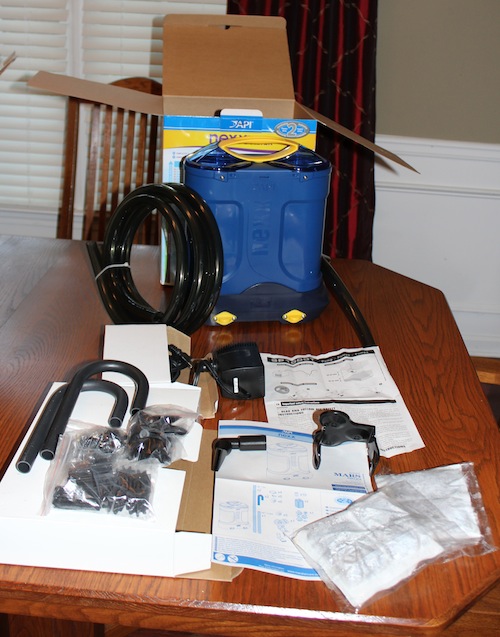
API Nexx Canister Filter Pump that will be submerged in the Aquarium

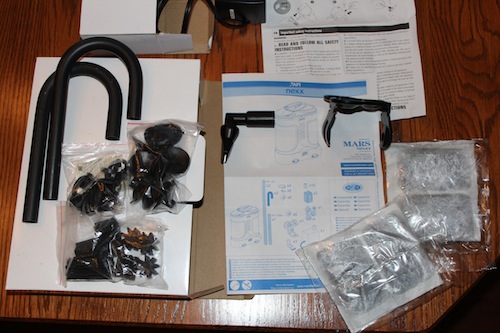
API Nexx Canister Filter Pump head and all the little parts for setup

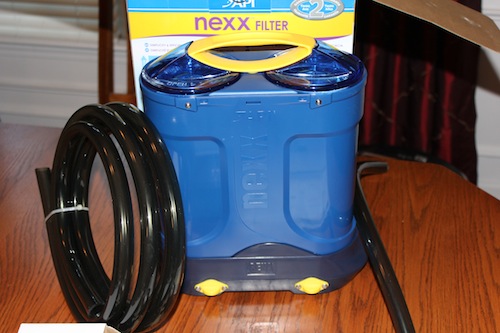
API Nexx Canister Filter – The Canister and flexible tubing!

All the parts of the API Nexx Canister Filter out and ready for setup!

Everything that was supposed to be in the box was there! Nothing was missing, and now its time to set my aquarium filtration system up! In order to do this and show it to you I made a little video presentation and submitted it as my first video on YouTube! I also embedded it below!

This is a fairly rough video. I think there are a few things that I would do differently. Hopefully, my videos will get better as I make more aquarium tutorial videos for all of you! Enjoy!

As for putting filter media into the API Nexx Canister Filtration system, I made another movie! I think it may have turned out a little bit better than the one above. I figured out how to get some HD out of it. It is on YouTube at the Aquarium Tip Tank YouTube Channel, and we’ve also embedded it for you below! Enjoy!

As you can see, setup and filter media installation of the API Nexx Canister Aquarium Filter is quick, and easy!

Grab your Aquarium Canister Filtration system now:

If you have any questions please let us know. What do you think? Leave comments below!

TJ

Comments { 0 }

Aquarium Tips of The Day | Measure Twice on DIY Aquarium Projects

Today’s Aquarium Tip Tank tip of the day will help you save a little bit of time, and possibly some frustration when performing do-it-yourself (DIY) aquarium projects. Wouldn’t it stink to come home from the hardware store with pieces of wood that were too small for the tank stand that your building? Just follow the good old saying, “measure twice, cut once” to save yourself the time of traveling back to the hardware store to buy new materials.

You should also probably write all of the dimensions and sizes that you come up with on a piece of paper somewhere. You may even want draw a diagram of your project with accurate dimensions. That way, you can bring it to the store with you when you are looking for the correct size pieces for your DIY light mounting system or your DIY aquarium plumbing.

Are you doing a DIY aquarium project? Leave your comments below. Say hello to us on Facebook!

TJ

Comments { 0 }

Aquarium Tip Tank Podcast 008 | Aquarium Filtration, Part 2

Aquarium Tip  Tank Podcast 008

In this episode of the Aquarium Tip Tank Podcast I discuss the mechanisms used to perform mechanical, chemical, and biological filtration in a home aquarium system. The devices I talk about include Hang-on-Tank filtration systems, Canister Filters, Under-gravel filters, and Wet/Dry filtration systems. I also discuss my choice of aquarium filtration for the 30 gallon saltwater aquarium that I’m in the process of setting up.

I chose to go with a Canister Filtration system and I chose the API Nexx aquarium filter. However, let me do a little clarification here. Make sure you do your research and choose the filtration system that you think will work best for your situation. I have to admit, if I had a larger tank, and more room in the tank stand under my tank, I probably would’ve tried to set up a wet/dry filtration system with a separate reservoir under my main tank. I would’ve sectioned off that reservoir and created different areas for my mechanical, chemical, and biological filtration. I would’ve tried to get a little refugium going, and maximized the potential for biological filtration.

I just don’t have that kind of room under my small, 30 gallon tank. The API Nexx filtration system should work great for what I’m looking to do with my home aquarium! I do think the API Nexx Filter is a great canister filtration system that is also expandable. If you’d like to use the API Nexx Filter, I’ve posted a link to Amazon for one below. If not, and you’re going to use a different type of filtration system for your aquarium that’s awesome! Go ahead and leave a comment below and tell us how you are filtering your aquarium water, or how you plan to!

Update: We do not currently recommend the API Nexx Canister Aquarium Filter. It leaked when I first set it up for my aquarium system check. Somehow, I got it to work for 4 days without any leaks during the system check. Then, I drained the aquarium, put live sand into the tank, put live rock into the tank, filled the tank up with saltwater and re-started the API Nexx Canister Filter. A few hours later I went to check on the tank only to find a puddle under the tank stand. The API Nexx Canister Filter was leaking from the base. I have removed the filtration system from the tank while it is cycling. I am in contact with representatives from RENA and will post updates with the outcome.

Grab your Canister Filtration System now:

Other posts mentioned in this Podcast:

We love our listeners and respect your opinion! Please search for “Aquarium Tip Tank” in iTunes to find all of our podcast episodes and leave a review. We’d love to know what we can do better and we’d love to keep improving! Also, please feel free to contact us with any aquarium questions, stories, and we really love breakthroughs – tell us about the fish you just added to your tank!

TJ

Comments { 0 }

Unpacking Ecoray 60DX LED Aquarium Lights!

If you’re a regular to Aquarium Tip Tank you may know that I am starting a new 30 gallon saltwater aquarium. You can hear all about how I went through the process of selecting the lighting system for my new aquarium in Aquarium Tip Tank Podcast 006. In the time since that podcast was released Ecoray actually came out with an upgraded versions of their LED systems that included a second dimmer for the blue LEDs so that now both the white and blue LEDs had their own separate dimmer. I decided to pay just a few more dollars for the upgraded version, and my new Ecoray 60DX lighting system arrived 5 days ago! Here are some pictures of the unpacking, and a few of my insights.

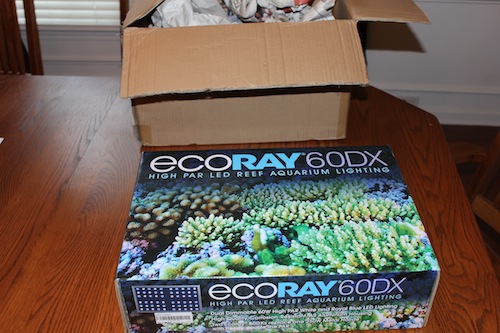
Ecoray 60DX arrival and out of the shipping box.


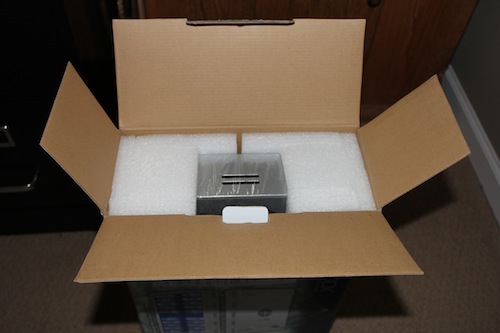
Ecoray 60DX Box Opened!

From the picture above you can see that the Ecoray 60DX was very well packaged. There was no damage to the box and all of the contents inside were well protected from shipping mishaps. The seller even packaged the system in a whole other box that was also well insulated.

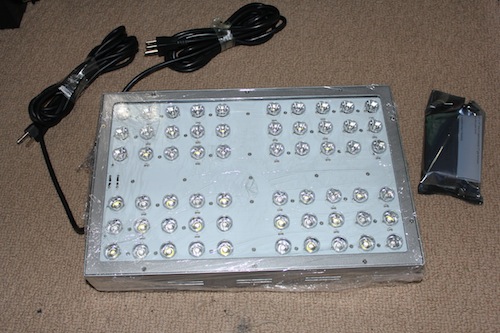
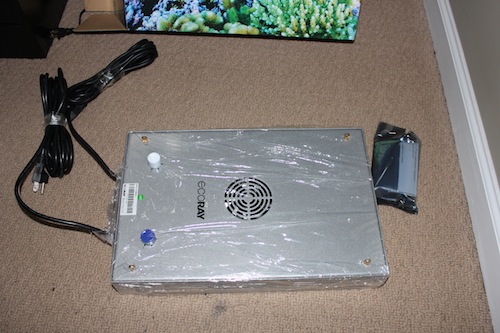
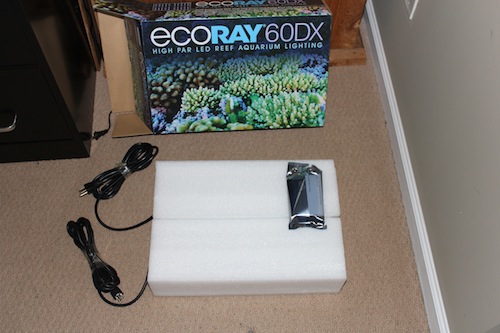
All Ecoray 60DX Contents out of the Box!

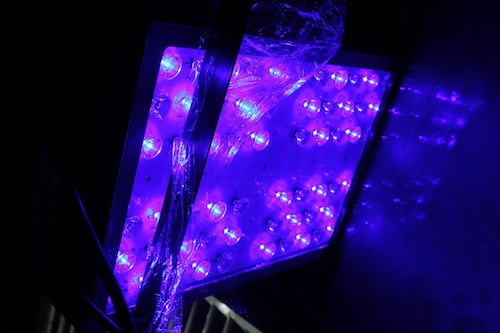
The LEDs of the Ecoray 60DX!

The “top side” of the Ecoray 60DX

In the 3 pictures above we can see the contents of the box being removed. We can also see the dual power cords and dual dimmers. One power cord and the white dimmer powers and controls the white LEDs, and the other power cord and blue dimmer powers the blue LEDs. The 2 separate power cords makes it possible to plug the cords into separate timers so that you can have whites and blues on at separate times. I’m thinking about possibly going through a daily light cycle where I turn the blue LEDs on first for 30 minutes to an hour, then have the white LEDs turn on so that I have both white and blue light for about 10 hours, then turn just the white LEDs off again and leave the blue LEDs on for an extra hour or two to replicate dusk/moonlight until I decide that the blue LEDs can be turned off. I can just program the timers correctly to achieve that light cycle. This is a very nice feature of the Ecoray 60DX, and I can just adjust the timers to try out different light cycles whenever, and however I want!

Yes, some more expensive LED aquarium lighting systems include the electronics and software so that the timers are already in the system, or so that you can control everything from your smartphone, tablet, or computer. I just didn’t want to go overboard and spend $300 or more extra on those components when I can just spend $20 on 2 timers. For me, it also adds an element of relaxation. I’ll set the timers, and just have to forget about it and not worry about it the rest of the day. I’ll have to look at, enjoy, and tinker with my lights timer settings. It’ll be fun. I won’t have constant control of the lights from everywhere, therefore, why worry about it the rest of the day. If I had those types of controls on my smartphone, I may actually be  more worried that I’d change something without even looking at my aquarium just to come home and figure out that I had messed something up!

Hands-free or dimmers that worked on a timer of some sort might be nice though. It would kind of be cool if I could schedule and time the lights so that I could have full power blue LED lighting during the daytime hours, but then set the dimmer to automatically go to 50%, then 25%, then to off in the night hours. For this setup, I have to get up and manually turn the dimmers to create a different lighting effect. However, controls like that still cost a whole lot of money and I wasn’t ready to spend the extra cash. I also don’t know how much I really NEED something like that. After all, the nano-reef that I currently keep does just fine with a metal-halide turning on for 10 hours, then just turning off. I’m sure I’ll just tinker with the settings and timers that I use with the Ecoray 60DX, find what I’m happy with, set it, relax, and let it go!

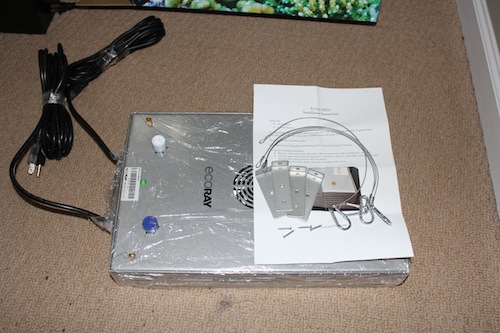
Small package containing mounting brackets, hanging cables, and instructions opened!

If you don’t have a lighting ballast, it is probably easiest to put a hook in your ceiling and hang the Ecoray 60DX LED system. I don’t really want to do that. I don’t have a ballast to mount the lighting system in currently. My plan is to head out to a hardware store and see what kind of mounting legs, or mounting stand that I can come up with. You’ll just have to check back later for my post about that!

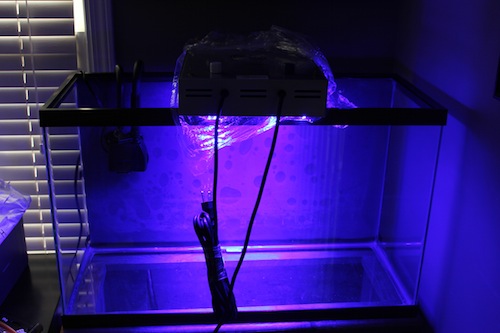
Ecoray 60DX Blue LEDs at 100%. White LEDs not even plugged in.

Light side of the Ecoray 60DX with Blue LEDs at 100%. White LEDs not plugged in. All Blues are working!

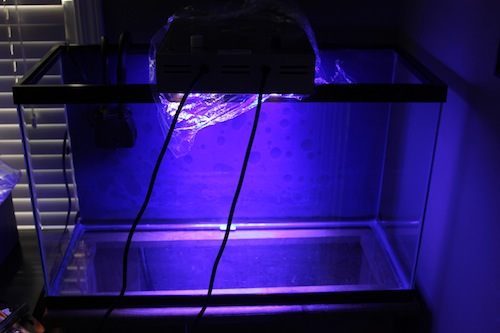
Ecoray 60DX with Wite LEDs at 100%. Blue LEDs turned off.

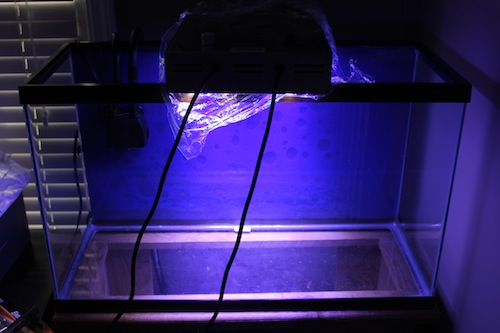
Ecoray 60DX White LEDs at 100%. Blue LEDs at 25%.

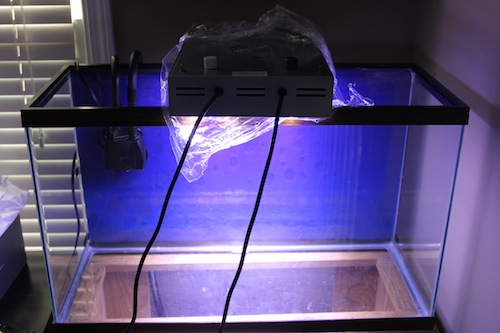
Ecoray 60DX White and Blue LEDs both at 100%. All systems go!

The last 5 pictures were taken with a flash turned off. The flash would have added light and not shown the effects of the lighting very well. I didn’t have a way to mount the light like I wanted to at this point so I just placed it on top of my aquarium tank and plugged it in to test everything for a few minutes. Everything worked great! Of course, I’m going to have to turn the system 90 degrees to get the correct light coverage for my tank, but I think everything will work brilliantly!

Grab your High PAR LED Light system now:


Check back later to see how I decide to mount the Ecoray 60DX lighting system! Got any comments? Leave them below!

TJ

Comments { 0 }

Aquarium Tips of the Day | Don’t Scrape with Substrate

Today’s Aquarium Tip Tank tip of the day will help you keep your tank scratch free. Understandably, you wouldn’t just take some of your substrate and start scraping it on the sides of your tank. However, it is possible to inadvertently get some into the scraper that you’re using and scratch the inside walls of your aquarium. Just pay a little bit of attention to what you’re doing when it is time to scrape the algae off the walls of your aquarium and make sure that you don’t have any gravel, sand, crushed coral, small shells, or any other kind of substrate stuck in between your scraper and your aquarium walls.

This is especially important with acrylic tanks. They tend to scratch a little bit easier. However, glass will scratch too if you don’t realize that you have a piece of substrate between your scraper and your aquarium wall.

Trust me, at some point you will get some sand wedged between your scraper and your aquarium wall. It might be with a magnetic scraper. It might be with a razor-like scraper. It might be with a softer, “acrylic safe”, scraper. At some point you will try to get all the way to the bottom of your tank to rid the entire inside surface of your tank of algae and debris. You’ll kick up a little substrate and the tiniest of particles will get wedged into the space between scraper and wall. Just remove your scraper from the wall, shake the debris loose in the water column, possibly take a quick second to remove more stubborn pieces of debris under a freshwater faucet, and resume. It certainly doesn’t take much time, and it will save you years of an unsightly eye sore.

Leave your comments below, and say hello to us on Facebook.

TJ

Comments { 0 }

Aquarium Tips of the Day | Protect Your Tank from Home Improvement!

Today’s Aquarium Tip Tank tip of the day will help you keep nasty chemicals and foreign debris out/off of your aquarium system! Ever use the vacuum or dust a wall around your tank just to look down at your aquarium and see a film floating in your aquarium water or a piece of foreign debris on your tank? It could be even worse if you were using a saw, drilling, sanding, or painting around your aquarium, there was sawdust or tiny paint splatters flying around, and you don’t realize until after the fact that you forgot to protect your aquarium system. Just make sure that you cover up and protect your aquarium system whenever you’re doing home improvement projects near your tank!

This could be as easy as throwing a large sheet over your aquarium set-up, but make sure that you don’t burn the sheet with your lights and that there is still enough ventilation for the aquarium. It would be much better to have your lights turned off for a little while and a large sheet over your tank than let chemicals from something like a pest exterminator float into your tank.

Do you have a creative way of protecting your aquarium when necessary? Leave comments below!

TJ
Comments { 0 }

Happy 4th of July USA! Help Save Your Coral Reefs!

It’s been a little while since we’ve talked about coral restoration here at Aquarium Tip Tank. In the last few days we’ve come across an interesting read about suggestions for market-based strategies for sustainable funding of restoration projects of marine environments in the Florida Keys National Marine Sanctuary (FKNMS). We’ve also found a link to a quick, and easy survey on Reef Relief’s site that asks SCUBA divers and snorkelers that have recently visited the Florida Keys a few short questions about their experience, and their awareness and participation level in reef conservation programs.

The Georgia Aquarium is involved in the Florida Keys reef conservation initiative. Brett Howell has been involved in his Conservation Fellowship at Georgia Aquarium for about a year and a half now. To sum things up, he is trying to find market-based solutions to funding issues of marine conservation programs. Many of these programs are currently funded by time-limited grants. At some point, the money necessary to run the coral nurseries and reef conservation efforts will run out, or the time will be up. They are trying to restore reefs that us SCUBA divers, snorkelers, and fisherman love to enjoy. There has got to be a way to keep these reef restoration programs running and they want your help and your ideas.

For much more detailed information about what I am talking about please head on over to the Gaia Endeavors blog post that contains the comment, from 19 endorsing organizations and 7 individuals, to support market-based strategies submitted to FKNMS here. I implore those interested to download the full comment that is at the bottom of that post and read it to get an understanding of their suggestions for a market-based funding solution.

Then, if you’re a SCUBA diver or snorkeler that has visited the Florida Keys and enjoyed the wonder and beauty of the underwater Florida Keys ecosystem, head on over to Reef Relief’s blog post here and leave your own feedback in the quick, easy survey that they have included at the bottom.

Got any coral reef restoration ideas?  Are you good at raising money for a good cause? Leave your comments below!

TJ
Comments { 0 }

Aquarium Tips of the Day | Take Your Tank Dimensions With You

Today’s Aquarium Tip Tank tip of the day will save you a whole lot of time and frustration. I know this because I’ve already done it once or twice with the new aquarium that I’m working on getting set up. I’ve gone to my LFS, had conversations about lights and set up, how much live rock and substrate I would need, etc. I came home, and did some research on these things. The entire time I was thinking that my tank was 24 inches wide. For some reason or another I decided to put a measuring tape to my tank again, just to figure out that my tank was actually 30 inches wide. All of my assumptions, calculations, research, and conversations that I had were completely wrong. I should’ve just made sure that I had the dimensions of my tank with me at all times!

I can’t use a light that has a maximum light stand width of 24 inches. Use the wrong width and some of my on-the-spot calculations for the volume of my tank had to be incorrect.

It’s really easy to do. I could’ve just had it in a note on my smartphone (by the way…I just made that note in my smartphone). I could’ve wrote the dimensions on a small piece of paper and stuck it in my wallet. It is so easy to have my tank dimensions with me at all times that I could’ve saved myself trips to the store, research time, and frustration by taking them with me. Just remembering them correctly would’ve been nice too.

Ever made a simple task harder? Have any breakthroughs and/or pictures of your aquarium? Leave comments below.

Comments { 0 }

Aquarium Tips of the Day | Rinse All of Your Tools Off

Today’s Aquarium Tip Tank tip of the day will help you keep from getting foreign particles into the water of your fish tank. Ever just grab a 5 gallon bucket and just start filling it with RO/DI water in order to top-up what your tank has lost due to evaporation? Then, halfway through the process look down and realize that there are several hairs, dust, and dirt particles floating around in it? Now, you have to dump that water out, rinse out the bucket, and start all over. You probably would’ve saved a whole lot of time if you had just rinsed the bucket out in the first place.

Just rinse your tools off before using them for your aquarium. This does not mean that you can use that bucket that you used to use to mix chemical household cleaners in as long as you rinse it out first. NEVER, use that bucket for your aquarium. However, you probably have clean, aquarium safe tools that you will use on your aquarium regularly. Prior to placing those tools into your aquarium water or your aquarium system, just rinse them off with normal tap water. It doesn’t have to be special filtered water or water that you’ve put special additives into. Just use the water that comes straight out of your tap.

See, even though you use those aquarium tools regularly, they still just sit around for some period of time every day. During that time they are collecting dust, dirt, and whatever other small particles might pass them by. I’m not saying that your house is dirty. Every house has a little dust and grime floating around it. You may not have used that bucket for 2 weeks since your last water change. Could something have fallen in it? Floated into it? Crawled into it? Maybe, but just check it out and give it a quick rinse!

Your aquarium isn’t used to those dust particles. They may make your water conditions go haywire. Its just easier to give your aquarium tools a quick rinse before using them and it ends up that it can save a lot of time as well.

Leave any and all comments below!

TJ
Comments { 0 }

Aquarium Tips of the Day | Try your hardest to Find Tank Bred Livestock!

Today’s Aquarium Tip Tank tip of the day won’t only help you save the planet, it may also save you the headache of nursing a stressed fish back to health. It is usually very simple to do. You may have to ask a few questions at your Local Fish Store (LFS) or send an email to the online fish store that you’re ordering from. However, the information you seek is normally readily available. All you have to ask is…Is this fish tank bred and tank raised? Where is this fish from and how did it get here? Please, please, please, try your very hardest to find tank bred livestock for your aquarium.

First of all, purchasing tank bred fish and invertebrates is the “green” way to go. If you are purchasing a tank bred fish you are not purchasing a fish that was removed from its home in a natural reef ecosystem or a lake or river somewhere halfway across the Earth. Those ecosystems need those fish in order to thrive and sustain natural habits and species diversity. If you remove too many of the smaller, tropical fish, then there isn’t enough food for the larger predators in that ecosystem.

Second, while tank bred and raised fish may cost more, they should also be easier to care for. You can have the peace of mind that you didn’t take anything from a natural ecosystem and the peace of mind that your fish is used to its surroundings. It wasn’t pulled from its home half way across the world and transported in a small bag or container thousands of miles to reach its new aquarium. The tank bred and raised fish isn’t stressed from all of that travel. It doesn’t know anything other than finding a home in a tank and being fed aquarium food. It should be a hardier fish, a less stressed fish, it should be used to its surroundings, it should be eating aquarium food, and it should adapt a whole lot easier to your tank. The question is, why wouldn’t you want a tank bred fish?

We’re not saying that there aren’t sometimes issues with finding tank bred fish. Almost all of the freshwater fish that aquarists keep these days are tank bred. However, there are only a few tropical saltwater fish that have been bred in an aquarium successfully. All we ask is that you try your hardest. You do some research, and you try your best to first find fish that are tank bred and raised.

Where do your fish come from? Leave your comments below!

TJ

Comments { 0 }
UA-29192030-1