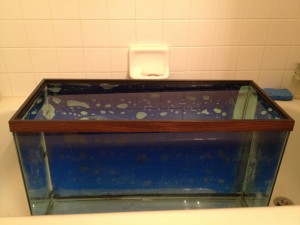
Here at Aquarium Tip Tank we’re always trying to share aquarium tips that will help you keep your water clean, and your fish and invertebrates healthy. Simple tips are also great because they don’t take much time for you to accomplish and they let you relax and enjoy your aquarium. This one is really simple. Just don’t overfeed your fish!
Tip of the Day | Don’t Overfeed your Fish!
Tip of the Day | Placing Your Reef Corals
This aquarium tip from Aquarium Tip Tank is all about where to place corals and sessile invertebrates in your reef aquarium that have different lighting requirements. Different corals require different amounts of light and we want to make sure that you set up your reef aquarium in a way that will keep all of your corals and sessile invertebrates happy and healthy! If they’re happy and healthy, then so are you.
First, as always, do your due diligence and do some research about the corals that you want to keep and their lighting requirements. You’ll probably find that there are corals that have high lighting requirements, or require a lot of light, and that there are low-light corals that don’t require direct light all of the time. In most aquarium tanks, your lighting is coming from the top of the tank. Therefore, and it may seem somewhat obvious, the high-light corals that require a lot of direct light during a large period of time of the day should be placed closer to your light source and at the top of your tank. The low-light corals that do not require direct sunlight, or don’t require light for as much time of the day, or are natural in deeper ocean environments, should be placed further away from your aquarium’s light source and at the bottom of the tank.
You can enjoy a little creativity with how you place your corals in your reef aquarium as well. Maybe you have a high-light coral at the top of the tank, or an overhanging rock structure that is providing some shade to an area in the middle of your tank. You may be able to place a low-light coral in that shade, and see how it grows!
Have corals with different lighting requirements? How did you place them in your aquarium? Leave a comment below.
TJ
The Harlequin Tuskfish – Choerodon fasciatus
What would a website about aquarium tips be without fish profiles? Here at Aquarium Tip Tank you will be able to find fish profiles that aren’t too scientific and confusing, but do include all of the necessary information about the natural, wild habitat of the fish and the tips, tricks, and information that you will need to keep the fish in your aquarium and keep it healthy!
First, we’re going to start with the Harlequin Tuskfish (Choerodon fasciatus). The alternating blue-trimmed white and orange strips of this fish make for a beautiful addition to a saltwater aquarium. Fret not, the four protruding blue teeth may make this fish appear ferocious, but it is actually relatively docile.
The Harlequin Tuskfish is part of a large wrasse family, Labridae. It can be found from Southern Japan to Australia in a widespread area of the Western Pacific. Specimens from Australia are known for there more intense, brighter colors. There are age differences in coloration as well. Juveniles have black false eye spots at the front and rear of the dorsal fins, on the anal fin, and on the pelvic fins. These are thought to be “protective” spots and disappear as the fish grows. In a healthy aquarium you can typically expect the Harlequin Tuskfish to reach 5 to 7 inches in length. Of course, there are some fish stories out there of the maximum size being 12 inches.
Harleguin Tuskfish are carnivores, generally aren’t picky and should be given a variety of meaty frozen and/or freeze dried seafood. Chopped krill, shrimp, squid, and non-oily fish can be part of a great well-rounded diet or the Harlequin Tuskfish. In the wild, it does use its teth to grasp and shred hard prey such as hard-shelled benthic invertebrates, small crabs, fish and shrimp, but usually avoid the resident shrimp, small fish, crabs, and sessile invertebrates in a healthy, well fed saltwater aquarium. This is not to say that large specimens won’t misinterpret new additions to the aquarium as food, but your best bet is to add any small fish or shrimp after the lights are turned off. Then, be on the look out for a little while and the darkness should give the new additions some time to get acquainted to the tank and find a hiding spot. Tuskfish do not actively eat corals, although they may inadvertently knock some over while searching for prey.
Tuskfish are generally hardy fish with easy to moderate levels of care and maintenance necessary. Like most reef fish they do best when the water conditions of the aquarium are kept with parameters similar to their natural reef environment, but otherwise do not have any special water quality and lighting requirements. Keeping a pH range of 8.0 – 8.4, specific gravity of 1.020 – 1.024, temperature range of 75 – 82 degrees F, and feeding properly should keep the Harlequin Tuskfish happy and healthy.
As usual, the bigger the tank size, the better for a Harlequin Tuskfish. If you do happen to get that specimen that grows to 12 inches long, it will definitely have some girth to go along with it. A minimum of 60 gallons is recommended, and if it grows bigger than the typical 5 to 7 inch aquarium Tuskfish, you’ll definitely want to have a bigger tank.
A substrate is optional for the Harlequin Tuskfish since it doesn’t bury itself in the sand at night, but a sandy, crushed coral substrate can always help with biological filtering and is recommended. It is also recommended to have live rock that is arranged with overhangs, openings, and caves for hiding and a sense of security for the Tuskfish. In the wild they are generally found as single specimens patrolling coral rubble, sandy areas, and areas of caves and overhangs on the reef.
You should probably not keep more than one Harlequin Tuskfish in your aquarium. More often than not, they are found alone on the reef, and their external characteristics do not make it easy to distinguish males from females.
As always, make sure you research your Local Fish store! Make sure they partake in conservation practices to keep the ocean reefs thriving! Make sure they have a live specimen guarantee, and you read it!
Any questions about the Harlequin Tuskfish? Leave your comments below. They are a great and beautiful fish for your marine aquarium!
TJ
Tip of the Day | Take Reefs Slow
Today at Aquarium Tip Tank we’re going to provide an aquarium tip that will help you with the success of your reef aquarium! This will help you keep from shocking your tank and your water conditions, and is similar to stocking fish. Its simple, and the tip is just to take it slow. Take time to stop and look around at the small organisms that might be growing very slowly in your new, beautiful ecosystem, or you might miss something fantastic. Take a 1 year period to work on and get your tank to its “final” settings, not 1 month.
At Aquarium Tip Tank we have talked about how aquariums don’t have to be a lot of hard work, and stressful. This tip may seem to go against that, and may make it seem like an aquarium takes a lot of time and effort. But really, we’re just trying to get you to pause, relax, observe, and enjoy the process of populating your tank with corals and invertebrates. Much like stocking your tank with fish too quickly, we’re also trying to make sure that you don’t stock your reef aquarium too quickly or too full.
Sessile invertebrates can grow at a very slow pace, and if you keep your water conditions clean and pristine, your corals and anemones will grow. But they don’t grow as fast as fish do. So, stock your tank with 1 to 3 invertebrate frags to begin with (depending on the size of your tank of course), add 1 to 3 hearty fish that are compatible with those invertebrates, and just relax, observe, and enjoy for a couple months while performing regular water changes, keeping pristine water quality, and performing your regular aquarium duties. After that, if you want to add a few more invertebrates, do your due diligence and repeat the process of stocking slowly!
How’s your reef aquarium coming along? Leave a comment below.
TJ
Tip of the Day | Unplug and turn off your heater when changing your aquarium water
Today’s aquarium tip is really just an added tip to keep you more relaxed about the lifetime of your heater. There are some heaters on the market these days that automatically turn off if the water level is below a certain level around the heater. On the other hand, some heaters don’t come with that option and it is always possible for that water level sensor to fail.
Coral Growing Sculptures
Over the weekend I found many interesting articles about the decline of coral reefs throughout the oceans and the people who are finding ways to re-grow the corals that humans have damaged. Of particular interest was a TED blog post about an artist named Colleen Flanigan and her Kickstarter campaign so I figured we’d share it here at Aquarium Tip Tank.
Colleen is an artist…a metalworker…a welder…a sculptor who was inspired by architect Wolf Hilbertz, who developed Biorock®. Biorock® is a mineral accretion technique for growing coral reefs. Biorock® uses a process by which low-voltage direct current is run through metal that is in seawater. The electrolysis that takes places attracts minerals such as calcium carbonate (the skeleton mineral of stony corals) and a very hard mineral surface is deposited on the metal framework. If coral polyps can use less energy creating their skeleton to live in, then they can spend more of their energy and resources growing and reproducing.
All of this just sent my brain storming with ideas and questions. I hope Ken Nedimyer and the Coral Restoration Foundation know about this technique. Could they use it to do what they’re doing? Have they already implemented this technique? The issue for underwater coral nurseries may be the power source for the low-voltage direct current. Many of the Biorock schematics seem to have a solar panel above the surface of the water that provides the necessary power. This type of system would mean that the coral nursery would not only be underwater, but also above water.
We could also possibly implement this technique inland, not only in our own home Aquarium tanks, but also in some of the coral nurseries that are set up on land to be sheltered from the storms. Why not grow corals on land and then transplant them to the ocean to rebuild our declining coral reefs?
I may give the technique a shot in the saltwater aquarium that I am working on setting up. If I do, I will do it on a very small scale and very early in my Aquarium’s life so that I don’t mess up and shock a fish. For now, I’m going to head over to Kickstarter and leave a donation. You should too. It looks like they need some help for a good cause and any donation helps!
Mentioned in this Post
What do you think? Leave a comment below.
TJ
Tip of the Day | Stock your Aquarium Slowly
Today, we will share an aquarium tip that will keep the fish that you have in your tank healthy, possibly help cycle your tank, and definitely help keep your water parameters stable. So, today’s tip is to stock your aquarium slowly, start with just a few hardy fish, and do not immediately stock your tank with a full load of fish!
Tip of the Day | De-chlorinate!
Here is yet another aquarium tip that will keep you more relaxed about the health of your fish and your aquarium! It is simple, it is cheap, and it may just save the lives of your pet fish. All you have to do is De-chlorinate the source water that you are using for your aquarium!
Most (if not all) municipal tap water is treated with chlorine and chloramine. Both chemicals are hazardous to fish. So, you can’t just take buckets full of your tap water and immediately fill your aquarium with it. You have to De-chlorinate in order for your pet fish to be healthy!
First, go out and get a cheap water test kit that will test for both chlorine and chloramine and test the tap water that you plan to use for your aquarium. These test kits can be found at your LFS, or you can head on over to your local plumbing and hardware store and they should have a test kit. You may have well water and think that you don’t have any chlorine and chloramine in your water. Well, some well tanks are treated with chlorine to reduce bacteria. Just do a quick test, and you’ll know for sure.
If you have to De-chlorinate, it should only cost you about $5-$10 a year. A regular, cheap bottle of De-chlorinating water treatment from your LFS should be enough to treat about 4,000 – 5,000 gallons of water. Make sure that you get a water treatment that takes care of both chlorine and chloramine. This should be written on the bottle, but may be in fine print somewhere. We don’t really recommend that you purchase the water treatments that De-chlorinate and have “added benefits.” Really, you just need to De-chlorinate and neutralize the chloramine. Anything else that the water treatment can do might mess with the natural biological filters that are in your substrate and keeping your aquarium ecosystem healthy.
You may not have to purchase anything to De-chlorinate unless you want to just spend that $5-$10 per year to be safe, and not worry about it. If you test your water and find that there isn’t any chloramine then you may just have to set your water out in a bucket overnight. Setting your water out in a container with a decent surface to air ratio for about 24 hours should allow all of the chlorine in the water to evaporate. Most reverse osmosis (RO) filters also De-chlorinate.
Once you’re sure that the water your adding to your aquarium due to evaporation, or for a regular water change is De-chlorinated go ahead and put it in your tank and your fish will stay happy and healthy! For saltwater aquariums just make sure that you add the correct amount of salt after you De-chlorinate if performing a scheduled water change.
How chlorinated is your tap water? Leave a comment below!
TJ
Tip of the Day | The Wet Test
Today we’ll share an aquarium tip that will help you relax, and stay stress free when setting up your aquarium. This time the scenario is that you’ve cleaned out your tank for your aquarium, you’ve set up the aquarium stand, you have all of your filters, lights, pumps, power-heads, sumps, pipes, heaters, and thermostats attached and your ready to put in your substrate and live rock and get your tank cycled! Slow down a little, and here’s why you should do a wet run of your complete aquarium system.
What if you’ve spent all that time doing the research and planning for your aquarium, you have everything in your tank, you flip the on switch, and a pump doesn’t work, or a heater doesn’t work? Now, you may end up having to take all of that substrate, live rock, rock-work, and decorations back out of your aquarium, drain the aquarium, replace the faulty part, and start populating your tank all over again! Just fill the system with water only and turn everything on to perform a wet test of your aquarium to save yourself some time and hassle if a pipe is leaking or a valve isn’t working properly. This way, the water is the only thing that you may have to empty out, you’ve saved yourself some time, and possibly saved yourself from losing some live rock or some of your substrate. There’s no need for that stress. Relaxation is what your aquarium is all about!
Ever had everything set up, turned the switch on, and something didn’t work? Comment below!
TJ
Aquarium Tip Tank Podcast 003 | TJ’s Tank Cleaning and Leak Test
Podcast: Play in new window | Download
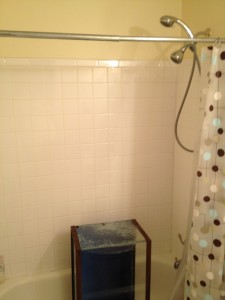
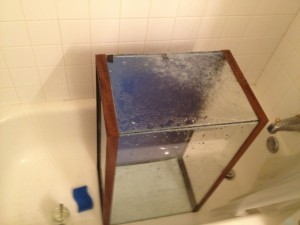
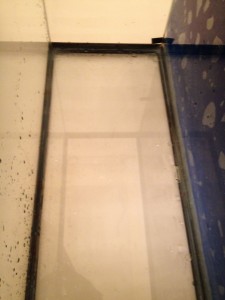
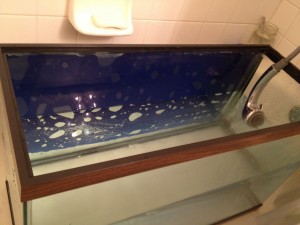
In this episode of Aquarium Tip Tank we take you through the start of TJ’s journey of starting a new saltwater aquarium. TJ tells you about how he cleaned his tank and performed a leak check on his tank. Included are some aquarium tips that will save you time and effort and allow you to relax and have fun with the aquarium setup process. So sit back, relax, and join us on this wonderful aquarium journey! Some pictures of the cleaning and leak test are included! As you can tell from the first picture in this post, there was some dirt and grime in the bottom of my tank.
How did your aquarium tank cleaning and leak check go? Tell us about it in the comments below!
TJ
Find Us on Facebook!
Follow us on Twitter!
Follow @Aquariumtiptank on Twitter
- Aquarium Tips of the Day | Cure your Live Rock May 3, 2012
-
 Did I make a bad decision getting a Canister Filter for a Reef Tank?
August 2, 2012
- Aquarium Tips of the Day | No Copper in Reef Tank! May 10, 2012
-
 Coral Basics
March 1, 2012
-
 Freshwater Aquarium vs Saltwater Aquarium
June 20, 2012
-
 Aquarium Tip Tank Podcast 016 | Aquarium Care Tips for a Holiday or Vacation, a Fish, and Some Problems
January 30, 2013
-
 Easy Cleaner Crew Acclimation
December 14, 2012
-
 How To Perform an Aquarium Water Change
November 22, 2012
-
 Aquarium Tip Tank Podcast 015 | The First Fish in My Aquarium
November 13, 2012
-
 Unpacking the AquaC Remora-S Protein Skimmer
November 12, 2012
-
TJ: Wes, Thanks for the comment! Honestly, no, I'm n...
-
Wes: Are you sure mechanical filter media only needs re...
- Freshwater Aquarium vs Saltwater Aquarium | Aquarium Tip Tank | Saltwater Tropical Fish: [...] more: Freshwater Aquarium vs Saltwater Aquar...
-
TJ: Thank you! A little work. A good camera for pictur...
-
click: Wow. This blog site is sick! How can I make it lo...
Browse More Content
Categories
What People are Saying
"We're loving the #TipoftheDay at @AquariumTipTank, great blog." - @R2FishSchool@R2FishSchool


